Car Safety

How to Properly Use Jumper Cables (2026 Complete Guide)

Auto Roamer
12 min read
Prices verified February 2026
Includes Video

The sickening click-click-click of a dead battery is a universally dreaded sound. You're trying to get somewhere, and suddenly, you're stranded. Your best bet to get moving again is a jump-start, but doing it wrong can damage both vehicles or, worse, cause injury.

The sickening click-click-click of a dead battery is a universally dreaded sound. You're trying to get somewhere, and suddenly, you're stranded. Your best bet to get moving again is a jump-start, but doing it wrong can damage both vehicles or, worse, cause injury. This is where understanding how to connect jumper cables correctly becomes critical. Jumper cables transfer electricity from a working battery to a dead one, allowing your engine to crank. While the process seems straightforward, a few key steps can prevent sparks and ensure a safe transfer of power. You'll need a set of jumper cables and another vehicle with a good battery. Remember, a 12-volt battery can explode if procedures aren't followed precisely Jump Starting Procedure | PASSPORT 2026. Keep sparks, open flames, and smoking materials far away from the battery Jump Starting Procedure | PASSPORT 2026. The entire process typically takes about 10-15 minutes How to Jump Start Your Car In 5 Easy Steps.

Infographic: Jumper cable usage specs comparison.
Key specifications for How to Properly Use Jumper Cables

The Short Answer

The core principle of using jumper cables is a controlled transfer of electrical energy from a healthy battery to a dead one, following a precise connection order to prevent damage and ensure safety.

Think of it like plumbing: you're creating a temporary circuit. The key is to avoid sparks, especially near the battery, which can release flammable hydrogen gas.

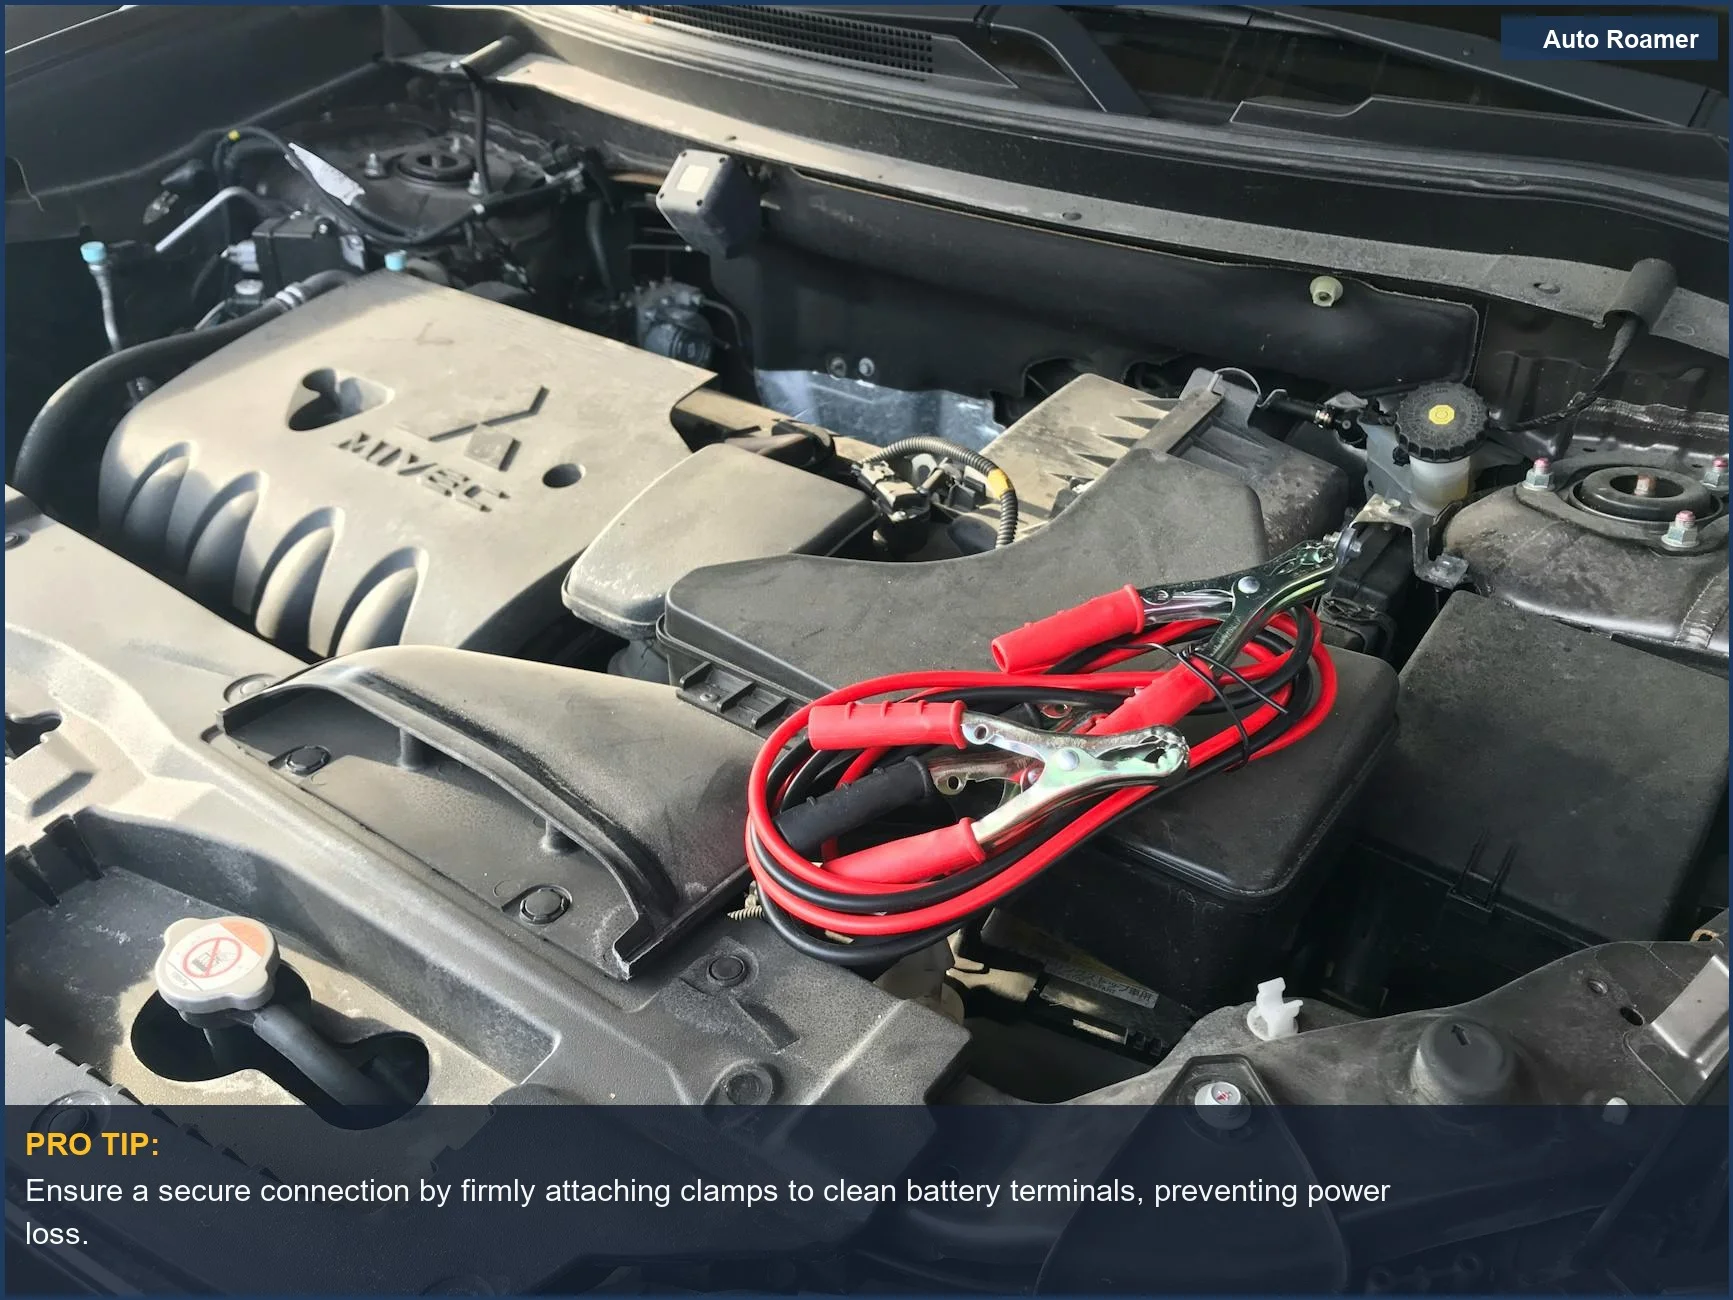
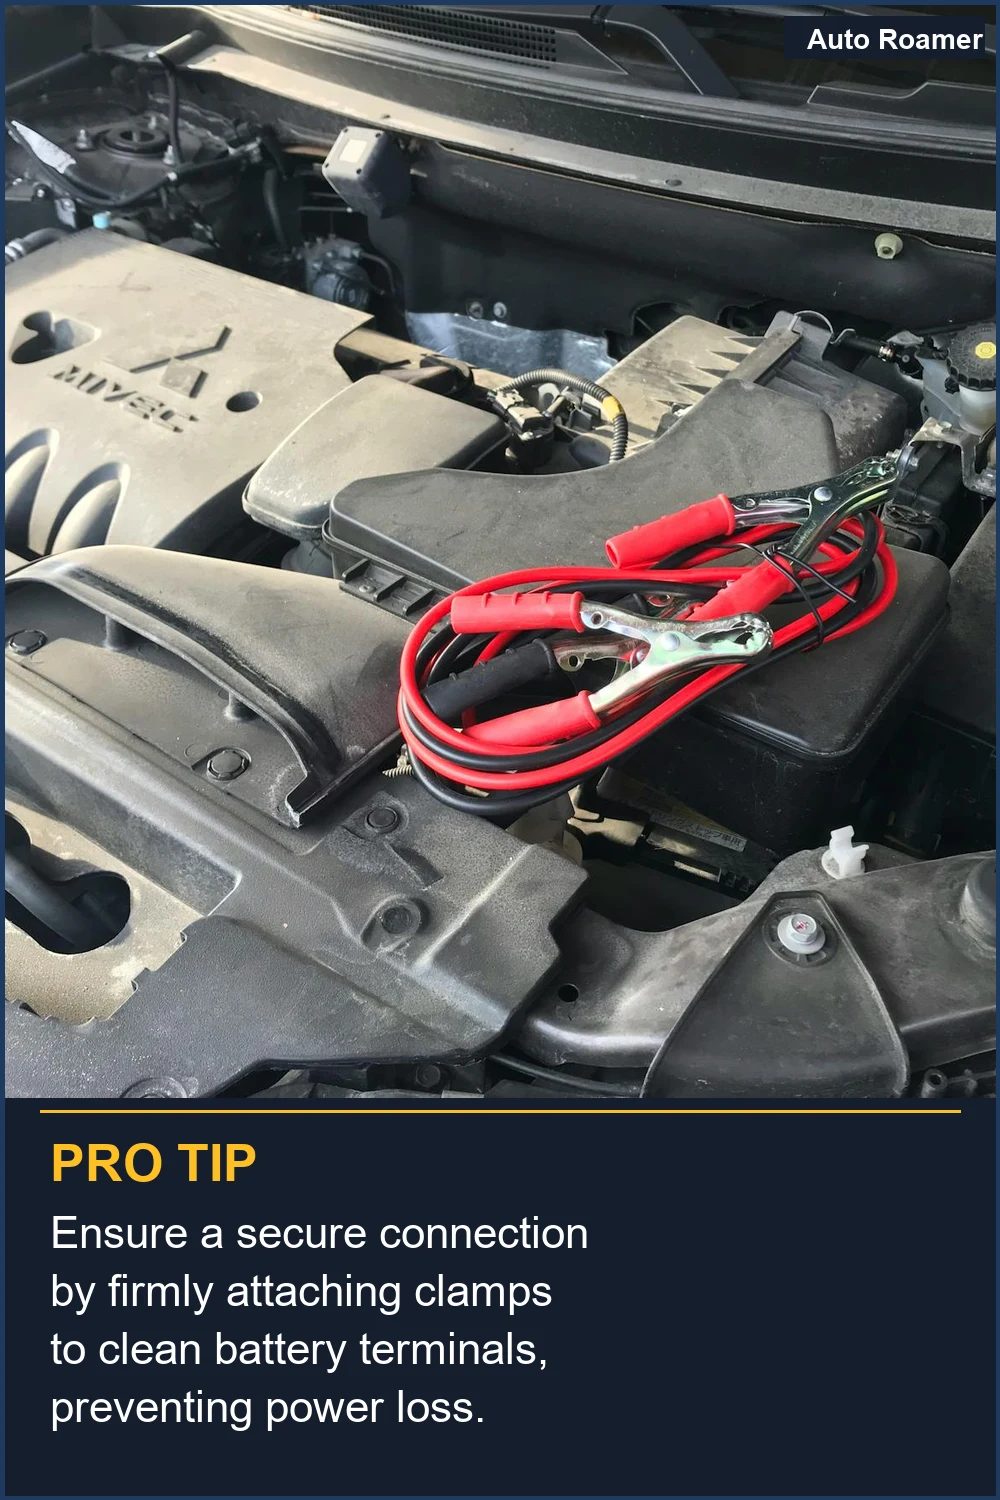
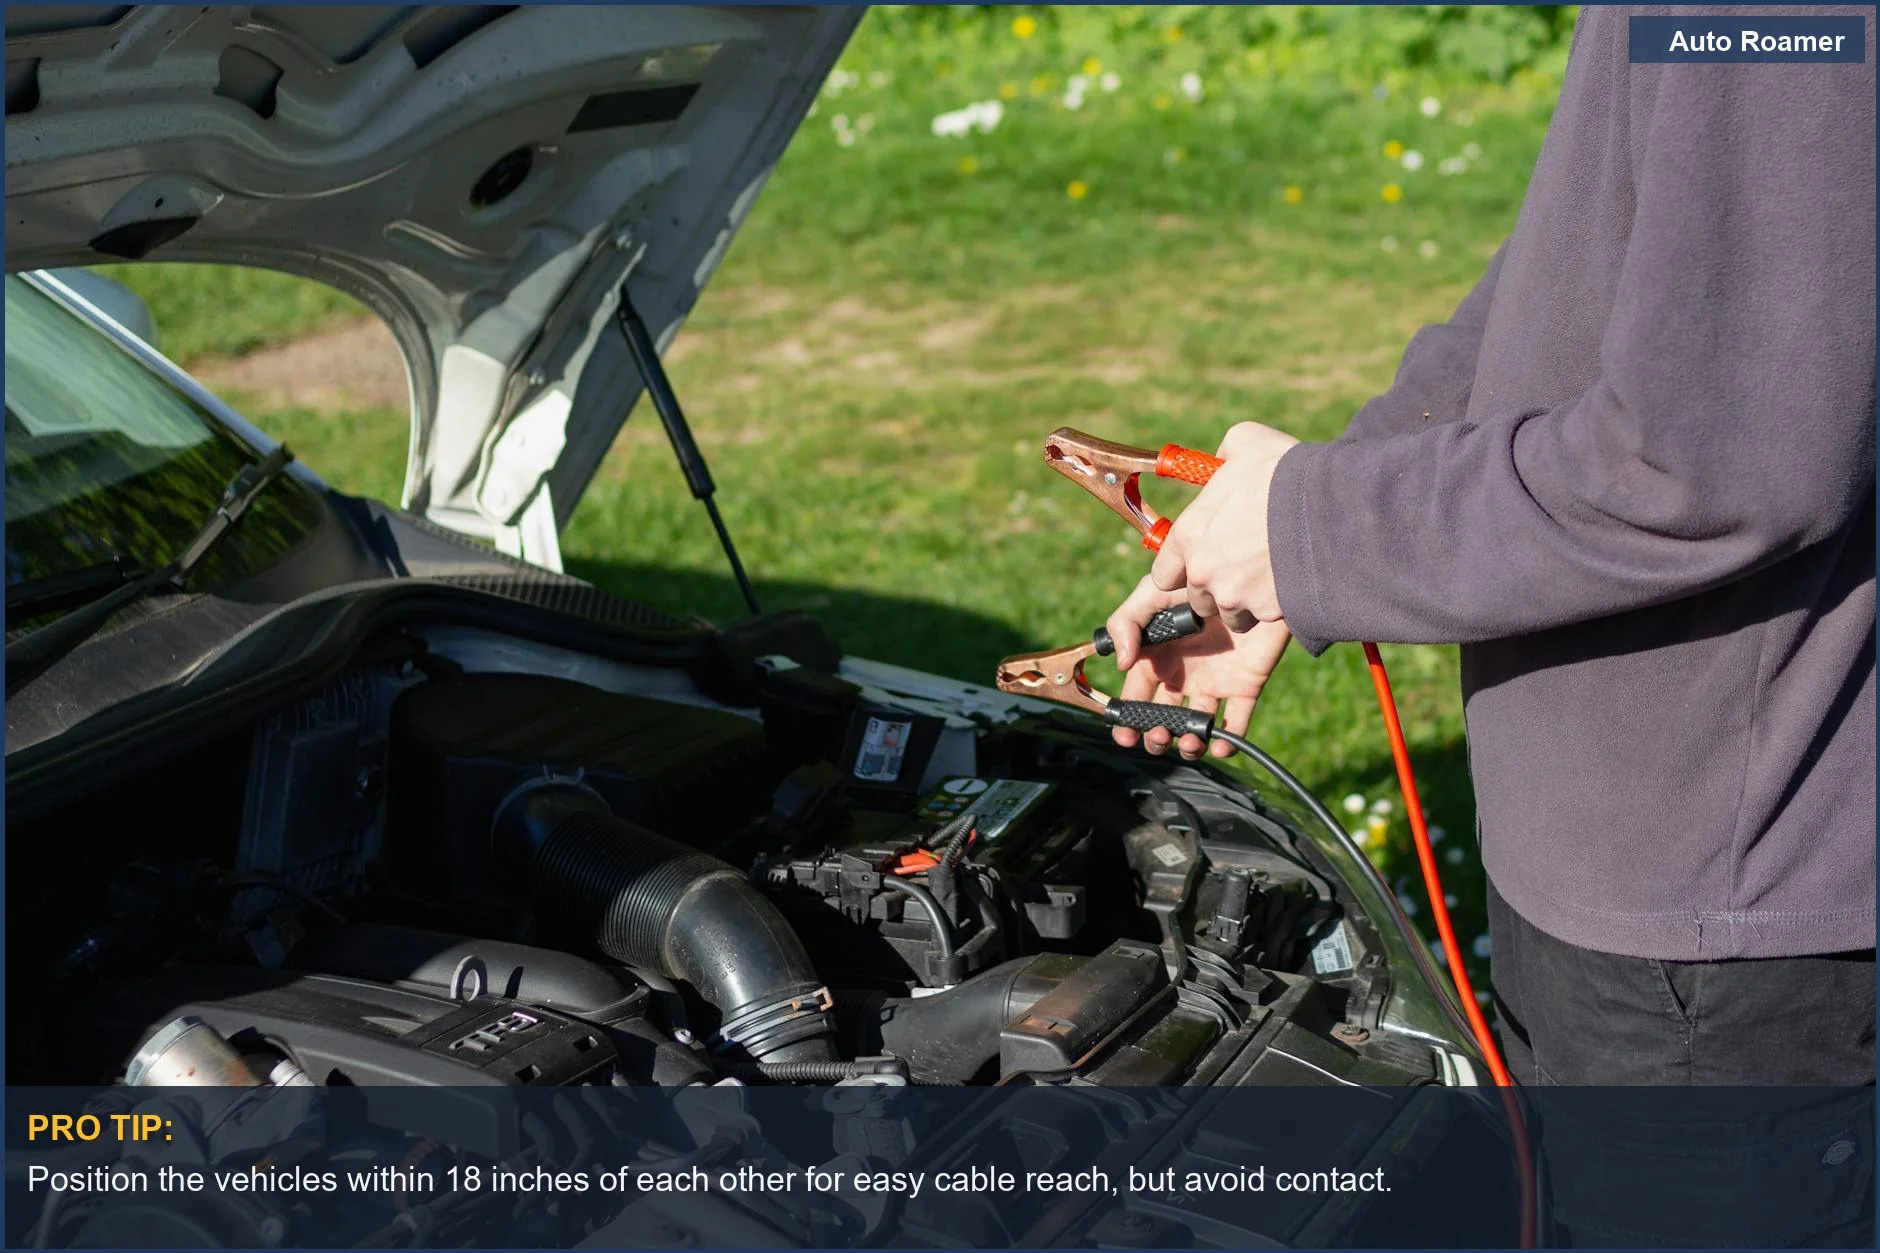
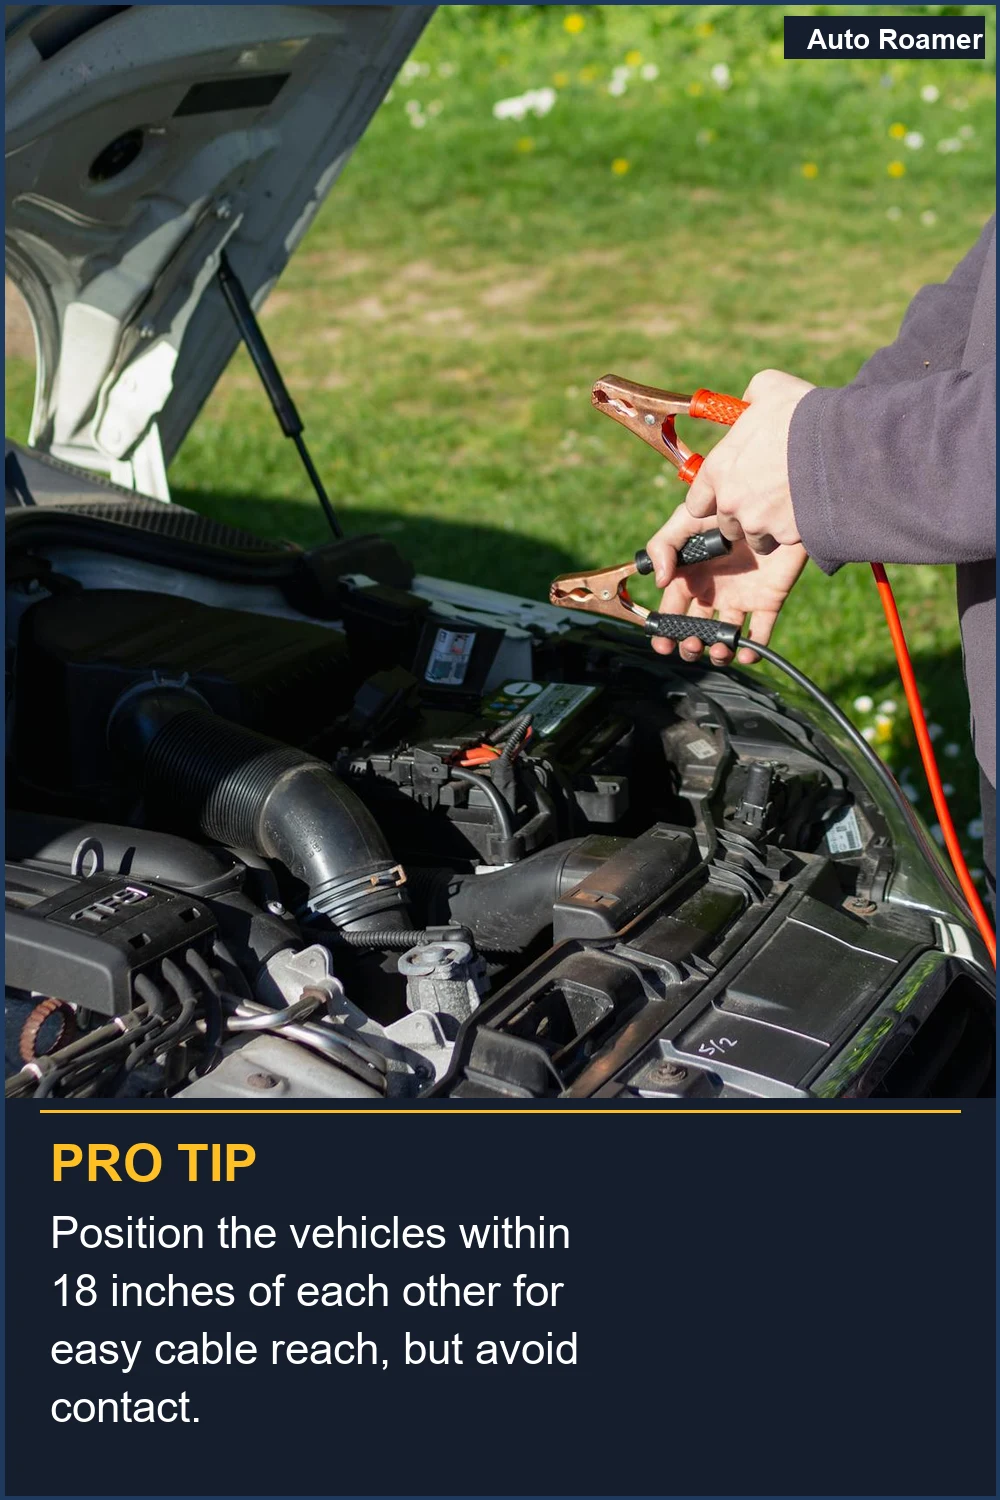
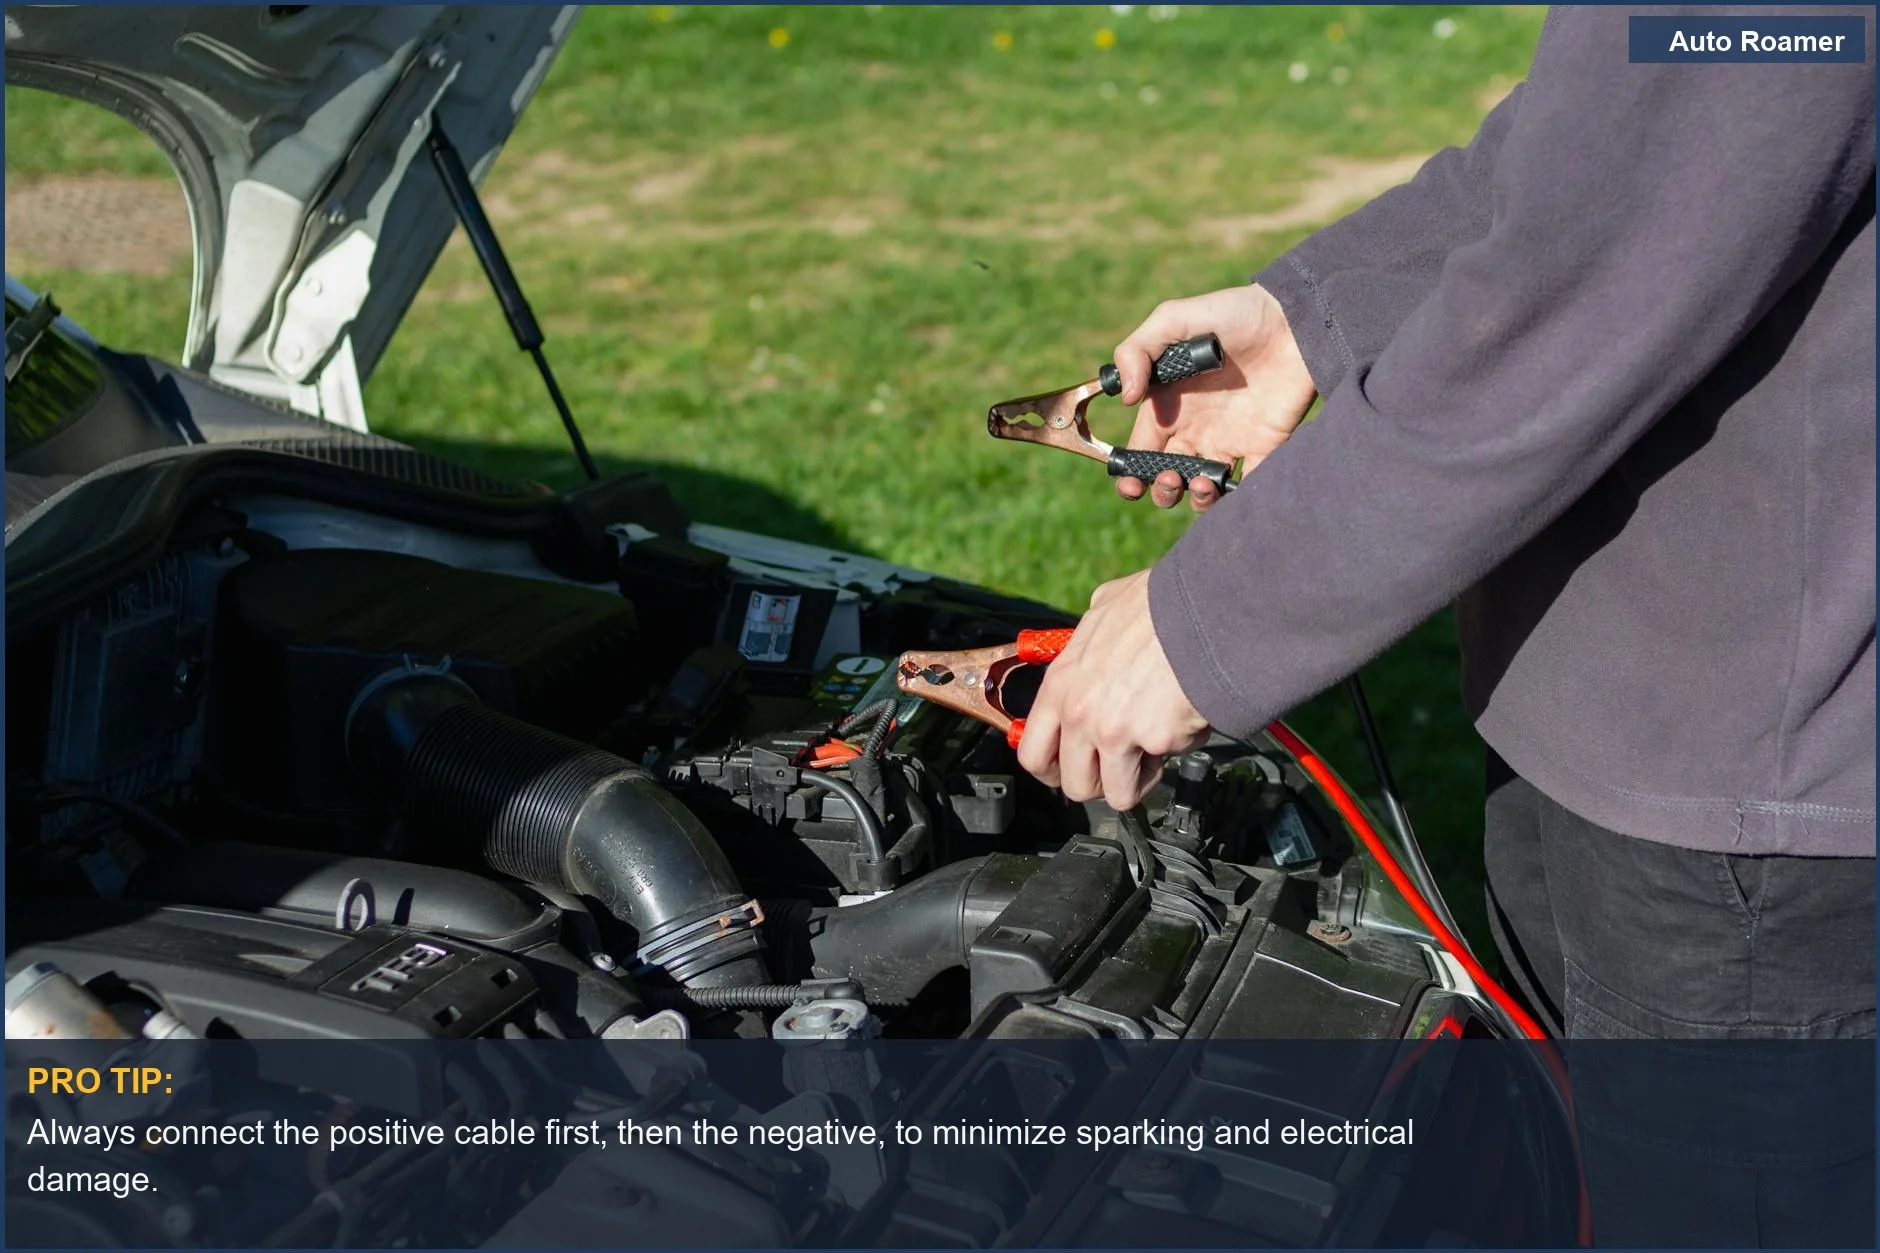
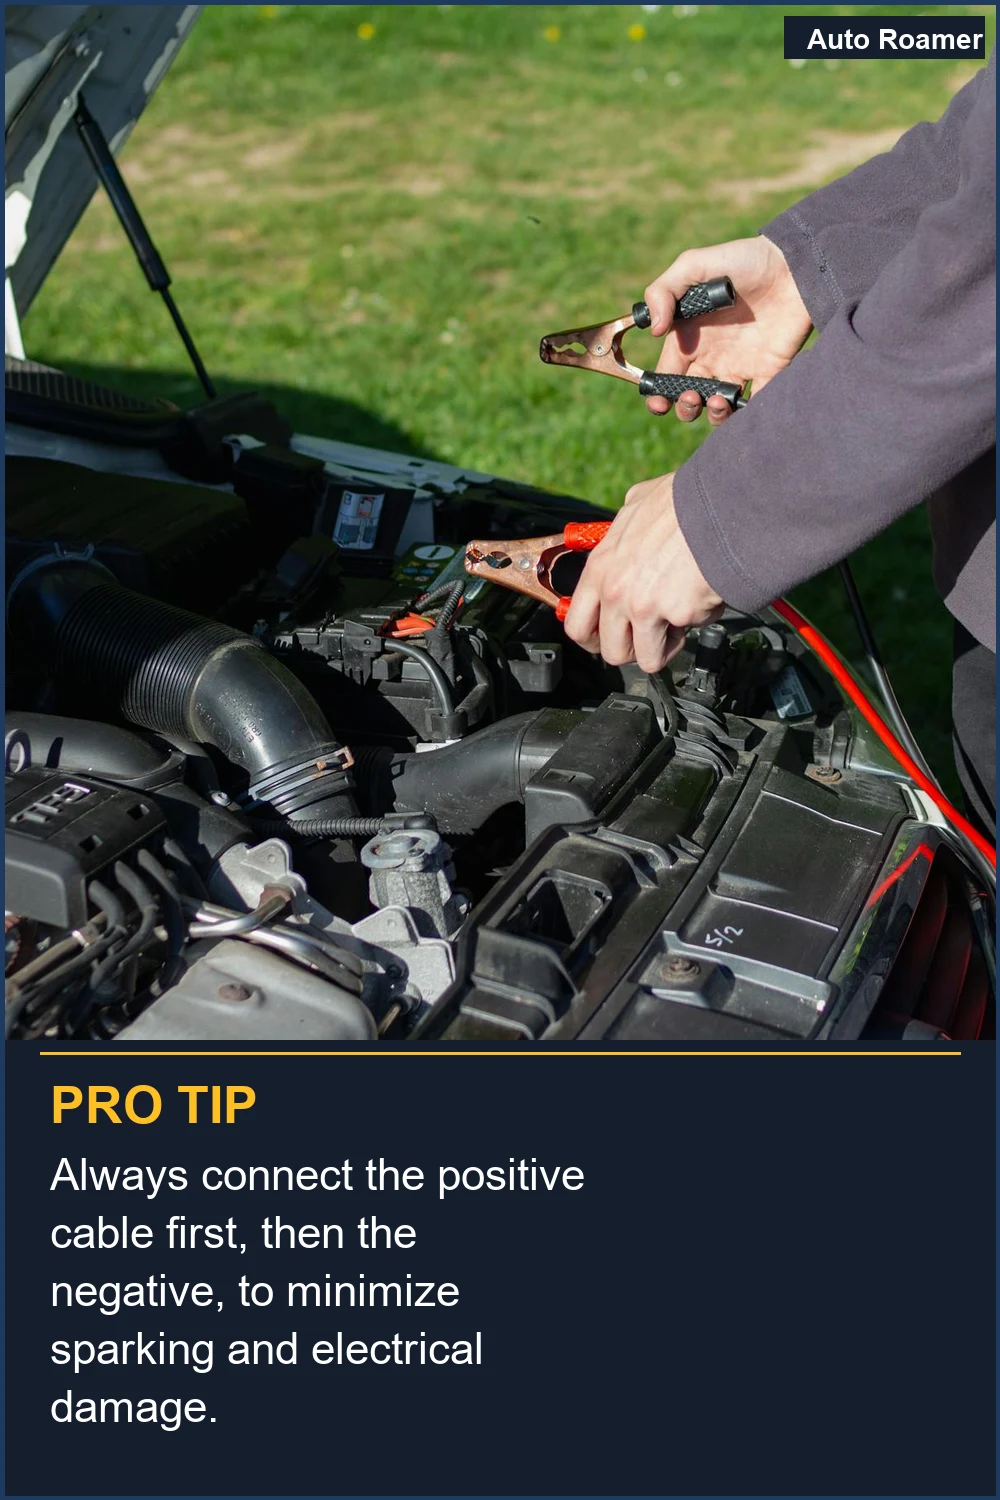
Always start by positioning the vehicles close enough for the cables to reach, but ensure they do not touch. With both engines off and parking brakes engaged, locate the batteries. You'll need to connect the red jumper cable first. Attach one red clamp to the positive (+) terminal of the dead battery, then connect the other red clamp to the positive terminal of the good battery What is the Proper Way to Jump Start a Car?.

Next comes the black jumper cable. This is where the crucial safety step lies: connect one black clamp to the negative (-) terminal of the good battery. For the final connection, attach the other black clamp to an unpainted, substantial metal part of the engine block or chassis of the dead car, away from the battery How To Jump A Car A Step By Step Guide. This grounding point minimizes the risk of sparks near the battery.

Once connected, start the engine of the car with the good battery and let it run for a few minutes, ideally increasing its RPM slightly Jump Starting Procedure | PASSPORT 2026. Then, attempt to start the car with the dead battery. If it doesn't start immediately, wait a few more minutes and try again.

After the dead car starts, carefully disconnect the jumper cables in the reverse order of connection: black from the chassis, black from the good battery, red from the good battery, and finally red from the now-running car's battery. Keep the engine running for at least 10-15 minutes to allow the alternator to charge the battery How to Jump Start Your Car In 5 Easy Steps.

For those who prefer traditional methods, here's how to jump start a car with another vehicle in our guide on jump starting a car.
Ensure a secure connection by firmly attaching clamps to clean battery terminals, preventing power loss.
Understanding how to connect jumper cables to your car battery is crucial for a safe and effective jump-start. A clean connection ensures optimal power transfer. | Photo by Max

What You Need to Know

1
Position the vehicles - Park the car with the good battery close enough for the jumper cables to reach the dead battery, but ensure the vehicles are not touching. Car and Driver recommends parking nose-to-nose or side-by-side, depending on battery location. Turn off both engines and engage the parking brakes.
2
Connect the red jumper cable - Attach one red clamp to the positive (+) terminal of the dead battery. Then, connect the other red clamp to the positive (+) terminal of the good battery. Toyota of Louisville emphasizes connecting the red clamp first to the dead battery's positive terminal.
3
Connect the black jumper cable - Attach one black clamp to the negative (-) terminal of the good battery. For the final connection, attach the other black clamp to an unpainted metal surface on the engine block or chassis of the car with the dead battery, away from the battery itself. This grounding point prevents sparks near the battery, which can release flammable hydrogen gas. AAA highlights the importance of proper connection order to prevent accidents.
4
Start the assisting vehicle - Start the engine of the car with the good battery and let it run for a few minutes, slightly increasing the RPMs. This allows the good battery to transfer some charge to the dead one. Honda's Passport 2026 advises starting the assisting vehicle's engine and increasing its RPMs slightly.
5
Start the dead vehicle - Attempt to start the engine of the car with the dead battery. If it doesn't start immediately, wait a few more minutes with the assisting vehicle running and try again. Once the dead vehicle starts, let both engines run for at least 10-15 minutes.
6
Disconnect the jumper cables - Once the dead vehicle is running, carefully disconnect the jumper cables in the reverse order of connection. Remove the black clamp from the engine block, then the black clamp from the good battery, followed by the red clamp from the good battery, and finally the red clamp from the now-charged battery. Car and Driver states this process should take approximately 10-15 minutes.

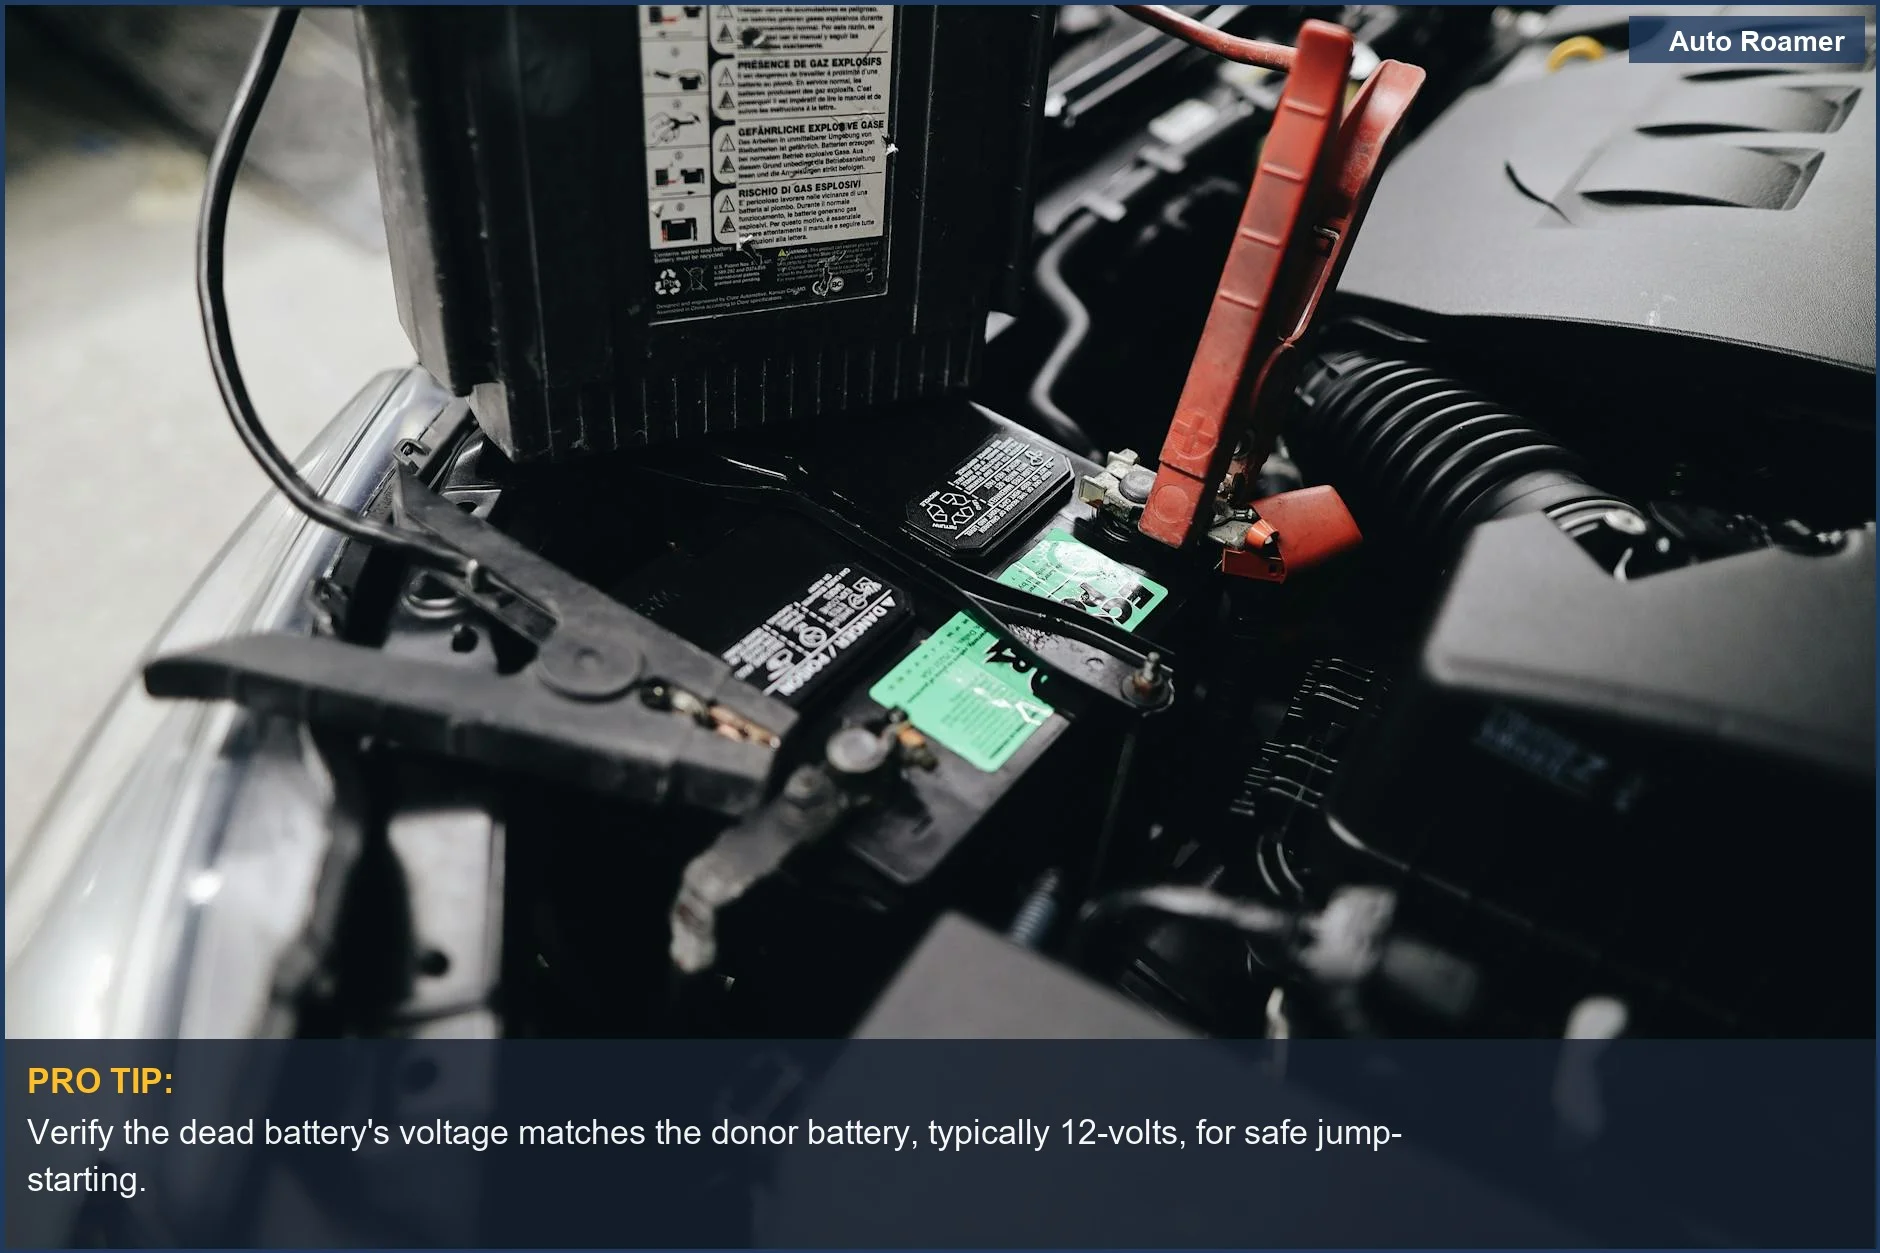
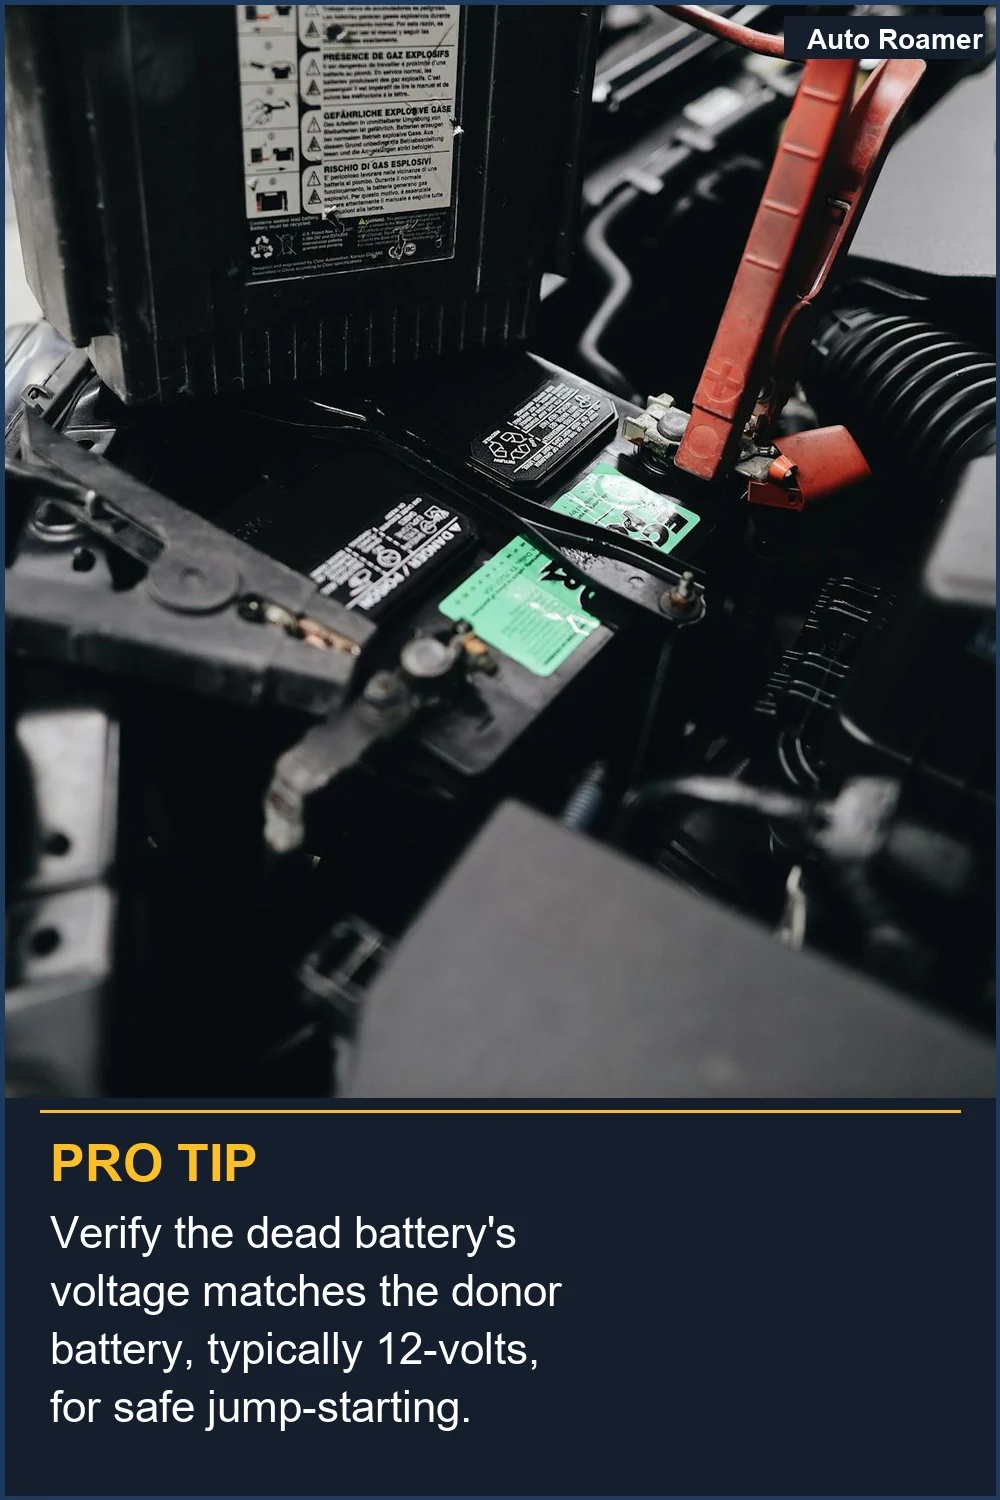
It's critical to ensure the jumper cables are properly secured so they do not detach during engine vibration. Honda's Passport 2026 warns against tangling the cables or allowing the ends to touch. Vehicle batteries are typically 12-volt, and you should always use a 12-volt booster battery. Honda's Passport 2026 also advises selecting a lower charging voltage than 15-volt if using an automotive battery charger. Cold conditions can degrade 12-volt battery performance, potentially preventing an engine from starting. Honda's Passport 2026 states that a 12-volt battery can explode if the procedure isn't followed correctly, leading to serious injury. Always keep sparks, open flames, and smoking materials away from the 12-volt battery. Honda's Passport 2026 stresses this hazard.

For quick solutions, consider using a portable jump starter for added convenience.
Position the vehicles within 18 inches of each other for easy cable reach, but avoid contact.
Learn how to jump a car with confidence. Proper vehicle positioning and cable length are key to a successful roadside assistance. | Photo by Daniel @ bestjumpstarterreview.com

How to Handle This

1
Position vehicles and ensure safety - Park the car with the good battery close enough for cables to reach, but do not let cars touch How to Jump Start Your Car In 5 Easy Steps. Engage parking brake on both vehicles and turn off engines to prevent accidental movement and minimize short circuit risk. Use a magnetic flashlight in poor visibility.
2
Connect red (positive) jumper cables - Attach one red clamp to the positive (+) terminal of the dead battery. Connect the other red clamp to the positive (+) terminal of the working battery. Connecting to the wrong terminal can cause sparks or damage electrical systems What is the Proper Way to Jump Start a Car?.
3
Connect black (negative) jumper cables - Attach one black clamp to the negative (-) terminal of the working battery. Connect the other black clamp to an unpainted metal surface on the engine block or chassis of the dead car, away from the battery. This grounding point helps prevent sparks near the battery, which can release explosive hydrogen gas How to Jump Start Your Car In 5 Easy Steps.
4
Start working vehicle and charge - Start the engine of the vehicle with the good battery and let it run for a few minutes. Slightly increase its RPM Jump Starting Procedure | PASSPORT 2026. This allows the good battery to charge the dead one. In freezing temperatures, 12-volt battery performance degrades in cold conditions Jump Starting Procedure | PASSPORT 2026.
5
Attempt to start dead vehicle and disconnect - After a few minutes of charging, try to start the engine of the car with the dead battery. If it starts, let it run for at least 10-15 minutes for its alternator to charge the battery. Disconnect the jumper cables in the reverse order: black from the chassis, black from the good battery, red from the good battery, and finally red from the now-charging battery How to Jump Start Your Car In 5 Easy Steps. Ensure clamps do not touch each other during disconnection. If the car doesn't start, repeat charging or seek professional help.
In case of unexpected battery issues during winter travel, knowing how to jump start a car can be invaluable.
Always connect the positive cable first, then the negative, to minimize sparking and electrical damage.
Mastering the technique of connecting jumper cables is essential for any driver. This close-up shows the precise clamp placement for safety. | Photo by Daniel @ bestjumpstarterreview.com

What This Looks Like in Practice

  • Cold Snap Commute in a Pickup Truck

    A delivery driver's truck died on a frigid morning, leaving them stranded miles from the nearest town. The 12-volt battery performance degrades in cold conditions, making it a prime suspect for failure Jump Starting Procedure | PASSPORT 2026. Fortunately, a passerby had jumper cables and was able to provide a jump, allowing the driver to continue their route.

  • Rush Hour Gridlock in a Sedan

    Stuck in bumper-to-bumper traffic, a driver's sedan suddenly refused to start. The constant stop-and-go nature of rush hour can tax a battery, and a dead one leaves you helpless. Using jumper cables from another vehicle, the driver was able to get their car running again, albeit after a significant delay.

  • Remote Roadside Emergency in an SUV

    Hiking in a remote area, a group returned to their SUV to find it wouldn't start, miles from any cell service. The risk of a dead battery is amplified when you are far from help, and improper connections can lead to sparks flying How to Use Jumper Cables. Thankfully, one member had a set of jumper cables and a basic understanding of how to connect them correctly to revive the battery.

  • Unexpected Power Loss in a Compact Car

    A student left their headlights on overnight in a compact car, resulting in a completely dead battery by morning. This common scenario highlights the need for a working jump start procedure. The estimated time for a jump start is often 10-15 minutes How to Jump Start Your Car In 5 Easy Steps, providing a quick solution to an inconvenient problem.

  • Evening Breakdown in a Minivan

    A family's minivan wouldn't start after a long day of errands, just as dusk was settling. The urgency of getting a vehicle running increases when daylight is fading. Following the proper steps to connect jumper cables allowed them to get the minivan started and head home safely.

To ensure you're never left stranded again, consider investing in one of the best portable jump starters.
Verify the dead battery's voltage matches the donor battery, typically 12-volts, for safe jump-starting.
A dead car battery can happen anytime, especially in cold weather. This detailed view shows how jumper cables attach to revive it. | Photo by Julia Avamotive

Mistakes That Cost People

Mistakes That Cost People

Symptom Connecting the negative jumper cable directly to the dead battery's negative terminal.
Signal Sparks flying near the battery.
Fix Connect the final negative (black) clamp to an unpainted, metal ground point on the engine block or chassis of the dead car, away from the battery. This is because batteries can off-gas hydrogen, which is highly flammable. Source
Symptom Connecting the jumper cables in the wrong order, or letting the clamps touch each other.
Signal Sparks, potential damage to vehicle electronics, or even battery explosion.
Fix Always connect the red (positive) clamps first to the positive terminals of both batteries. Then, connect one black (negative) clamp to the negative terminal of the good battery. Finally, connect the other black clamp to a ground point on the dead car's engine block or chassis, not directly to the dead battery. Source, Source
Symptom Using jumper cables with damaged insulation or corroded clamps.
Signal Poor connection, overheating, or short circuits.
Fix Before attempting to connect jumper cables, inspect them for any signs of fraying, cracks in the insulation, or heavy corrosion on the clamps. Damaged cables are a safety hazard and can lead to ineffective jumps. Source
Symptom Assuming all batteries have the same voltage or type.
Signal Damage to the electrical systems of one or both vehicles.
Fix Ensure both vehicles have 12-volt batteries. While most cars use standard lead-acid batteries, newer vehicles might have AGM or lithium-ion batteries. Always check your owner's manual for specific jump-starting instructions for your vehicle, especially if it's a newer model. Source
Symptom Not running the engine of the donor car long enough after the jump.
Signal The jumped car dies again shortly after disconnecting the cables.
Fix After the dead car starts, let both engines run for at least 10-15 minutes. This gives the dead battery time to receive a sufficient charge from the alternator of the running car. Source
Symptom Letting the vehicles touch or the jumper cables tangle.
Signal Short circuits, sparks, and potential damage to the vehicles.
Fix Park the vehicles close enough for the cables to reach but ensure they do not touch. Also, be careful not to let the jumper cable ends touch each other once they are connected to a battery. Source
To avoid battery issues during your next trip, consider strategies from our guide on keeping your battery charged.
Infographic: Jumper cable pros/cons for proper use.
Product comparison for How to Properly Use Jumper Cables

Key Takeaways

Understanding how to manage heat in your vehicle is essential, so here’s what to do if your car overheats: what to do if your car overheats.

Frequently Asked Questions

What's the right way to connect jumper cables to jump a car?
To connect jumper cables correctly, first attach a red clamp to the positive (+) terminal of the dead battery. Then, connect the other red clamp to the positive (+) terminal of the good battery. Next, connect a black clamp to the negative (-) terminal of the good battery, and finally, connect the last black clamp to an unpainted metal surface on the engine block of the car with the dead battery, away from the battery itself.
Can you explain the order for hooking up jumper cables?
The proper order for hooking up jumper cables is crucial to avoid sparks and damage. Start by connecting the red clamp to the positive (+) terminal of the dead battery. Then, connect the other red clamp to the positive (+) terminal of the good battery. Next, attach a black clamp to the negative (-) terminal of the good battery, and finish by connecting the final black clamp to a grounded metal surface on the dead car's engine block.
What's the safest way to use jumper cables to get a car started?
For safe jumper cable use, ensure both vehicles are turned off and parked close enough for the cables to reach without touching. Connect the red clamps to the positive (+) terminals of both batteries first. Then, connect the black clamp to the negative (-) terminal of the good battery, and the final black clamp to an unpainted metal surface on the engine of the car with the dead battery to ground it.
How do I connect jumper cables when one car battery is dead?
When connecting jumper cables to a dead battery, begin by attaching the red clamp to the positive (+) terminal of the dead battery. Then, connect the other red clamp to the positive (+) terminal of the car with the good battery. For the negative connection, attach a black clamp to the negative (-) terminal of the good battery, and then connect the remaining black clamp to a solid, unpainted metal part of the dead car's engine block.
What are the steps for hooking up jumper cables correctly?
The correct steps for hooking up jumper cables involve connecting the red clamps to the positive (+) terminals of both the dead and good batteries. After that, connect one black clamp to the negative (-) terminal of the good battery. The final connection is a black clamp attached to a bare metal part of the engine block on the car with the dead battery, serving as a ground.

Sources

Related Articles